 Feb 17, 2026
 How to Import a CAD File and Generate Marketing Images With AI
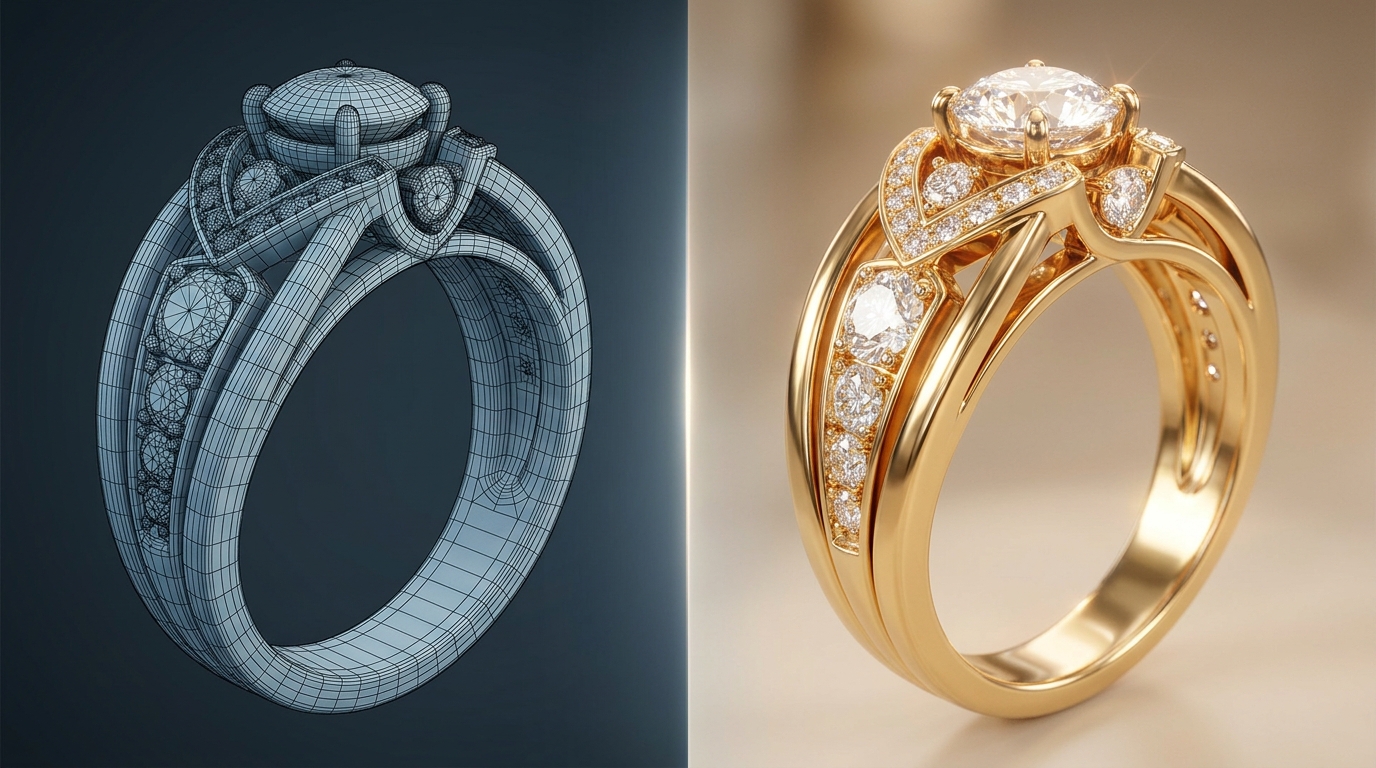
Most jewelry CAD files live a quiet life. A designer builds the model in Rhino or 3Design, exports an STL for the manufacturer, and that's the last time the file does anything useful creatively. The renders that come back from the manufacturer are functional — good enough to confirm the geometry — but rarely good enough for a catalog, a client presentation, or a product page.
Getting marketing-quality imagery from a CAD file traditionally means hiring a render artist, waiting for turnaround, going back and forth on lighting and materials, and spending money before you've even decided if the design is going into production.
AI changes that math completely. Here's how it works in Diatech Studio.
What File Formats Studio Accepts
Studio accepts GLB, STL, GLTF, and its own native format. GLB is the most commonly used for this workflow because it packages geometry and materials together in a single file — no missing texture references, no broken links when you upload.
If your CAD software exports OBJ or FBX, most designers convert to GLB first using a free tool like Blender or an online converter. It takes about thirty seconds and the quality difference is negligible for marketing purposes.
Importing and Viewing the Model
Drag the file directly onto Studio's canvas or use the file picker from the File menu. Studio automatically detects the file type and opens it in the 3D Model Viewer — a fully interactive WebGL viewer where you can rotate, zoom, and inspect the model from any angle.
The first thing worth doing is just spinning the model around. You'll see immediately if the geometry is clean, whether there are any obvious mesh issues, and how the proportions read at different angles. This is faster and more informative than doing the same thing in your CAD software because you're seeing it in a neutral presentation context rather than a modeling viewport.
The Advanced Rendering Controls
This is where the CAD import workflow gets genuinely powerful. Studio's 3D viewer exposes a full suite of scene controls:
Camera controls: position, rotation, field of view, focal depth (aperture, focus scale, focus bias). Adjusting focal depth adds the shallow depth-of-field look that makes product photography feel premium.
Lighting controls: position, intensity, and color. Moving the light source dramatically changes how metal surfaces read — a high position gives you that clean floating-in-air product look; a low angled light emphasizes surface texture and dimension.
Material assignments: Studio distinguishes between diamond meshes and metal meshes, and lets you set each independently. Metal finish can be set to matte or glossy variants. You can assign different colors to the diamond and metal meshes separately — so switching a design from yellow gold to white gold to rose gold is a single material change, not a re-render request to an artist.
Skybox and background: Toggle the skybox on or off, set a custom background color.
Preset angles: An Angle menu provides one-click snap buttons to jump to Isometric, Side, Front, Top, and Back views — useful for getting consistent camera positions across multiple designs in a collection.
Once you've dialed in the lighting and materials, use the 3D Model Recording feature to export a video sequence rendered frame-by-frame. You can record up to 720 frames, which gives you a smooth 360-degree turntable video — exactly the kind of looping product video that performs well on product pages and social.
Generating Marketing Images From the CAD Model
Beyond the interactive viewer, Studio's AI design tools work directly on CAD-derived projects. The workflow is:
- Import your CAD file and get it oriented correctly in the viewer
- Take a render from the angle you want using the preset snaps or manual camera positioning
- Use the AI tools from there — Enhance Image to improve photographic quality, Place on Model to generate lifestyle imagery with the piece worn, Videography to create a product video from the still
The Place on Model tool is particularly useful for rings and pendants where the worn perspective changes the buying decision. You go from a floating CAD render to a lifestyle shot without booking a model or a photographer.
For background removal — which you'll want for e-commerce product pages — the Remove Background tool works well on CAD renders because the geometry is clean and the edges are precise. Cleaner input geometry means better cutout quality.
The Clean CAD Tool
If you're importing a file that came from rapid prototyping, scanning, or a CAD tool you don't normally use, the mesh quality sometimes isn't great — dense, irregular triangles that make the model look rough or heavy to process.
Studio's Clean CAD tool rebuilds the surface using straight, symmetrical triangles. It reduces geometric complexity while preserving the design's form. The result is a lighter file that renders faster, looks cleaner in the viewer, and produces better results when you use it as an AI generation reference.
It's a one-click operation from the CAD viewer toolbar, and it's worth running on any imported model before you start generating marketing assets from it.
Generating Variations of a CAD Design
Here's a workflow many teams use but not everyone knows is possible: once you have a CAD model in Studio, you can use it as a reference input for AI generation.
Upload the CAD file, render it from a good angle, then use Studio's Reference Image Upload to pass that render into a new generation. This gives you AI-generated design variations that are stylistically anchored to your actual CAD geometry — useful when you want to explore what a design would look like in a different aesthetic direction without rebuilding the CAD model.
Combine this with Project-Level Instructions set to a specific collection style, and you can generate a family of designs that all feel coherent with an existing piece in your catalog.
What to Expect From the Results
AI-generated marketing images from CAD files are good — not perfect. The AI uses the CAD render as a visual reference and generates a photorealistic interpretation, which means it captures the form and proportions well but may introduce slight variations in surface detail.
For most marketing use cases — catalog imagery, product pages, client presentations, social content — the quality is well above the threshold. For manufacturing sign-off where exact geometry matters, you still want to validate against the original CAD file.
The practical workflow most teams land on: use Studio for all pre-production and marketing imagery, use the original CAD file only at the point of manufacturing handoff. That separation of concerns is where AI jewelry design tools and traditional CAD tools complement each other best.
Recent Posts
Jewelry Price Book: How to Set Org-Wide Gem Rates and Match Diamond Inventory
Studio's Price Book lets admins set org-wide gem rates once, feeding every AI pricing estimate automatically, while the Diamond Inventory Matcher checks stock against a design's specs before you quote a client.
AI Gemstone Jewelry Design: How to Generate Sapphire, Ruby, and Emerald Pieces That Look Real
Colored gemstones render very differently than diamonds. Here's the specific prompting, spec-locking, and pricing workflow for getting sapphire, ruby, emerald, and pearl jewelry to look convincing in Diatech Studio.
AI Jewelry Design Draft Quality: How to Iterate Faster Without Wasting Credits
Studio's Auto tool now has a Draft quality tier for AI jewelry design, a faster, lower-cost setting built for early concept exploration before you commit credits to a polished render.