 Feb 20, 2026
 AI Jewelry Design from a Photo: How Reference Images Change What You Get
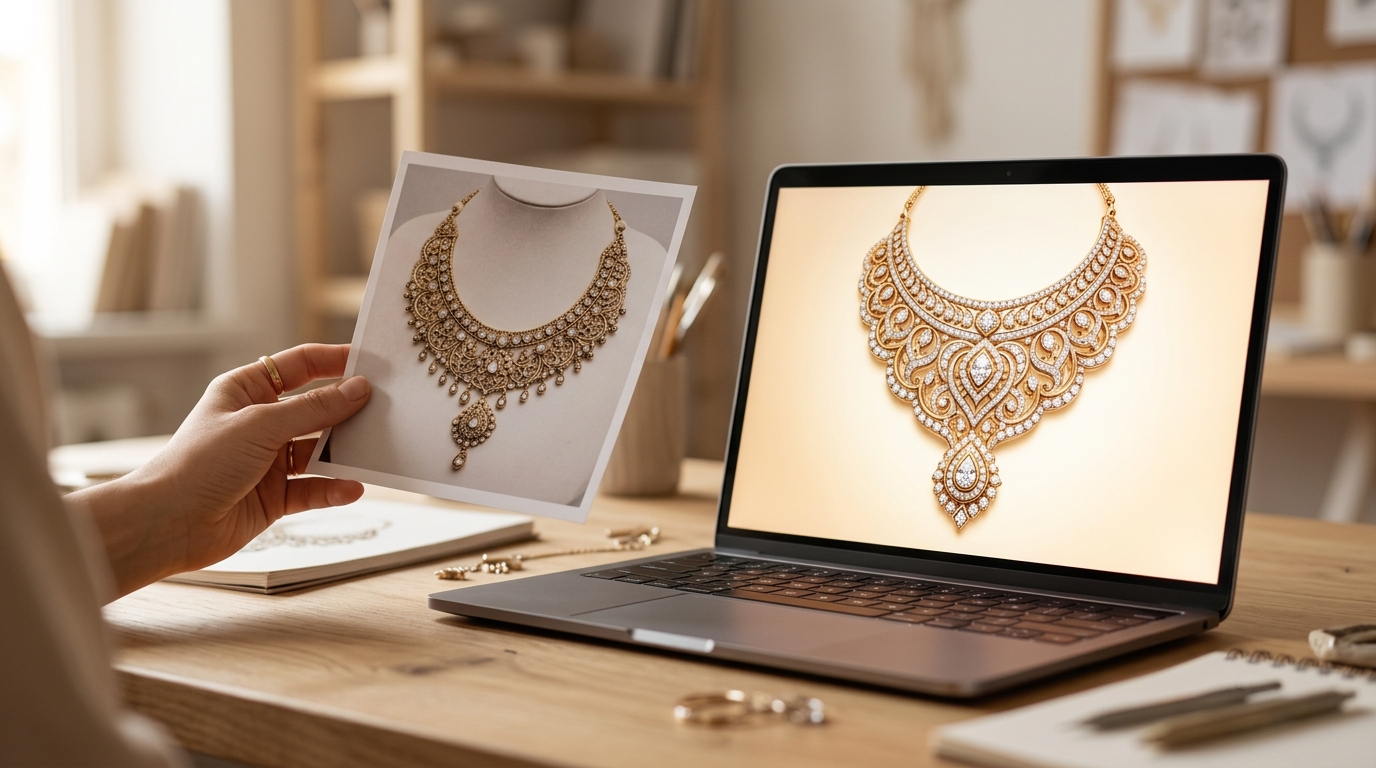
There is a big difference between telling an AI what you want and showing it. Text prompts are powerful, but a reference image gives the AI something that words often can't — the exact proportions, the specific mood, the material feel of a design you're trying to capture or build from. Once you start using reference images in Diatech Studio, it changes how you think about the whole generation process.
Here's a practical breakdown of how reference image input works, when to use it, and how to get the most out of it across different design scenarios.
What "Reference Image" Actually Means in Studio
Studio has a few distinct ways to bring an image into the AI workflow, and they behave differently depending on how you use them.
Reference Image Upload at project creation: when you start a new project by uploading a photo rather than typing a prompt, Studio uses the image as a visual anchor for the first generation. It reads the design in the photo and generates a polished AI interpretation — preserving the general form and aesthetic while producing a clean, render-quality result.
Reference image in the AI Chat: if you paste or upload a photo directly into the chat panel of an existing project, you're adding it as visual context for whatever prompt you type next. This is useful for mid-project direction changes — "make this more like the piece in this photo" — without starting over.
@-mentioning another project: in the prompt bar, typing and selecting a different project passes its design images as style context. This lets you reference pieces already in your Studio library without downloading and re-uploading them.
Paste from clipboard: if you find something on a website or in a document, you can paste it directly onto the canvas or into the chat. Studio handles the upload automatically.
When to Use a Photo vs. a Text Prompt
Text prompts work best when you have a clear, describable concept in your head. "Round brilliant solitaire ring, thin band, platinum, classic four-prong setting" is a good prompt because every element translates cleanly into words.
Reference images work best when:
- You're trying to match an existing piece's aesthetic feel rather than its exact geometry
- A client has sent you an inspiration image and you want to generate something in the spirit of it
- You're redesigning a competitor's piece in your own brand's style
- The design has a quality — a textural feel, an organic curve, a balance of negative space — that's genuinely hard to describe in words
The two approaches also combine well. Upload a reference image to anchor the aesthetic, then write a prompt that adjusts specific elements: "similar to the reference image but in rose gold instead of silver, with a larger center stone and a more contemporary band profile."
Using Client Photos as Briefs
One of the most common real-world uses of reference image input is when a client shows up with a photo. Maybe it's a piece they already own and want redesigned. Maybe it's something they saved from Instagram. Maybe it's an heirloom they want to modernize.
In the traditional workflow, a designer has to interpret that photo into a CAD brief — translating visual information into technical specifications before anything can be generated. With Studio, you skip that step. Upload the photo, write a short direction prompt if needed, and generate a starting point directly. Then use annotations to gather the client's feedback on the AI output rather than trying to describe the brief in the abstract.
This compresses the brief-to-first-visual step from hours to minutes. And because clients are reacting to an actual image rather than a description, the feedback is more specific and the revision cycle is faster.
Getting Better Results From Reference Images
A few things that make a material difference in reference image quality:
Photo clarity matters. A sharp, well-lit product photo produces better AI output than a blurry phone shot taken at a trade show. The AI reads visual detail, and if the detail isn't there to read, it fills in gaps — sometimes well, sometimes not.
Cropping helps. If you have a photo of a full outfit and you want the AI to focus on the ring, crop to the ring before uploading. Studio reads the whole image, and excess visual content can dilute the signal.
Combine with a prompt for direction. The reference image gives the AI a visual baseline. Your text prompt steers it from that baseline. Without any prompt, Studio will generate something that closely resembles the reference. Add a prompt and you can move it in any direction — different metal, different stone, more modern, more ornate.
Use the Similarity slider strategically. When generating variations with a reference, the Similarity control (Low / Moderate / High / Very High) determines how tightly the output is anchored to the original. High similarity is good for refinements; Low similarity gives you something more interpretive that uses the reference only loosely as inspiration.
The Pinterest Workflow
If your inspiration images live on Pinterest boards — and for most jewelry designers, they do — Studio connects directly to your Pinterest account. From the File menu, you can browse your boards and import an entire board's pinned images into the current project as design variations.
This means your curated inspiration collection becomes an active design reference rather than a passive mood board. You're not downloading images, re-uploading them, and managing file folders. The Pinterest import brings them in directly and they're immediately available as visual context for generation.
Reference Images for Style Consistency
Reference images aren't only useful at the start of a project. They're also a powerful tool for keeping a collection coherent.
Once you have a design you love, you can use it as a reference input for the next piece in the collection — effectively propagating the aesthetic from one piece to the next. Combined with Project-Level Instructions set to a specific collection brief, this gives you two layers of style control: explicit written instructions and a visual reference anchor working together.
For larger teams, the @-mention system means any team member can reference any project in their prompt. A junior designer generating new concepts can reference the creative director's approved design without ever downloading a file — they just the project in the prompt bar and the AI treats it as visual context automatically.
What the AI Actually Reads in a Reference Image
Worth understanding: the AI doesn't trace the design in a reference photo. It reads it visually — the proportions, the material appearance, the structural relationships, the aesthetic mood — and generates something informed by those signals rather than mechanically derived from them.
This means a reference image input is more like showing the AI a direction than giving it a template. The output will be original, not a copy. That's actually useful: you get the spirit of the reference without the intellectual property risk of exact reproduction, and the AI interpretation often introduces subtle improvements or design choices you wouldn't have thought of yourself.
It also means that very abstract or unusual reference images can produce surprising results. A texture photograph, a piece of architecture, even a fabric pattern can serve as a visual reference for a jewelry design — the AI extracts aesthetic signals from whatever you give it. Some designers use this intentionally to generate designs that feel distinctly different from standard jewelry training data.
Recent Posts
Jewelry Price Book: How to Set Org-Wide Gem Rates and Match Diamond Inventory
Studio's Price Book lets admins set org-wide gem rates once, feeding every AI pricing estimate automatically, while the Diamond Inventory Matcher checks stock against a design's specs before you quote a client.
AI Gemstone Jewelry Design: How to Generate Sapphire, Ruby, and Emerald Pieces That Look Real
Colored gemstones render very differently than diamonds. Here's the specific prompting, spec-locking, and pricing workflow for getting sapphire, ruby, emerald, and pearl jewelry to look convincing in Diatech Studio.
AI Jewelry Design Draft Quality: How to Iterate Faster Without Wasting Credits
Studio's Auto tool now has a Draft quality tier for AI jewelry design, a faster, lower-cost setting built for early concept exploration before you commit credits to a polished render.