 Jun 20, 2026
 Lab-Grown Diamond Jewelry Design: How to Generate, Specify, and Price LGD Pieces
The lab-grown diamond market isn't a niche anymore. A significant portion of jewelers are doing a third or more of their diamond business in LGD, and the clients requesting it aren't just budget-conscious buyers. They're people who've done their research and specifically want a conflict-free, environmentally lighter option with a larger stone for the same money.
The design side is mostly the same as natural diamond work. But the moment you get to quoting and sourcing, the differences matter. This post covers how to move through the whole lab-grown diamond jewelry design cycle in Diatech Studio: from generating the initial renders to specifying LGD in your pricing breakdown and checking your inventory for stones that actually match.
Designing LGD Jewelry: What Changes and What Doesn't
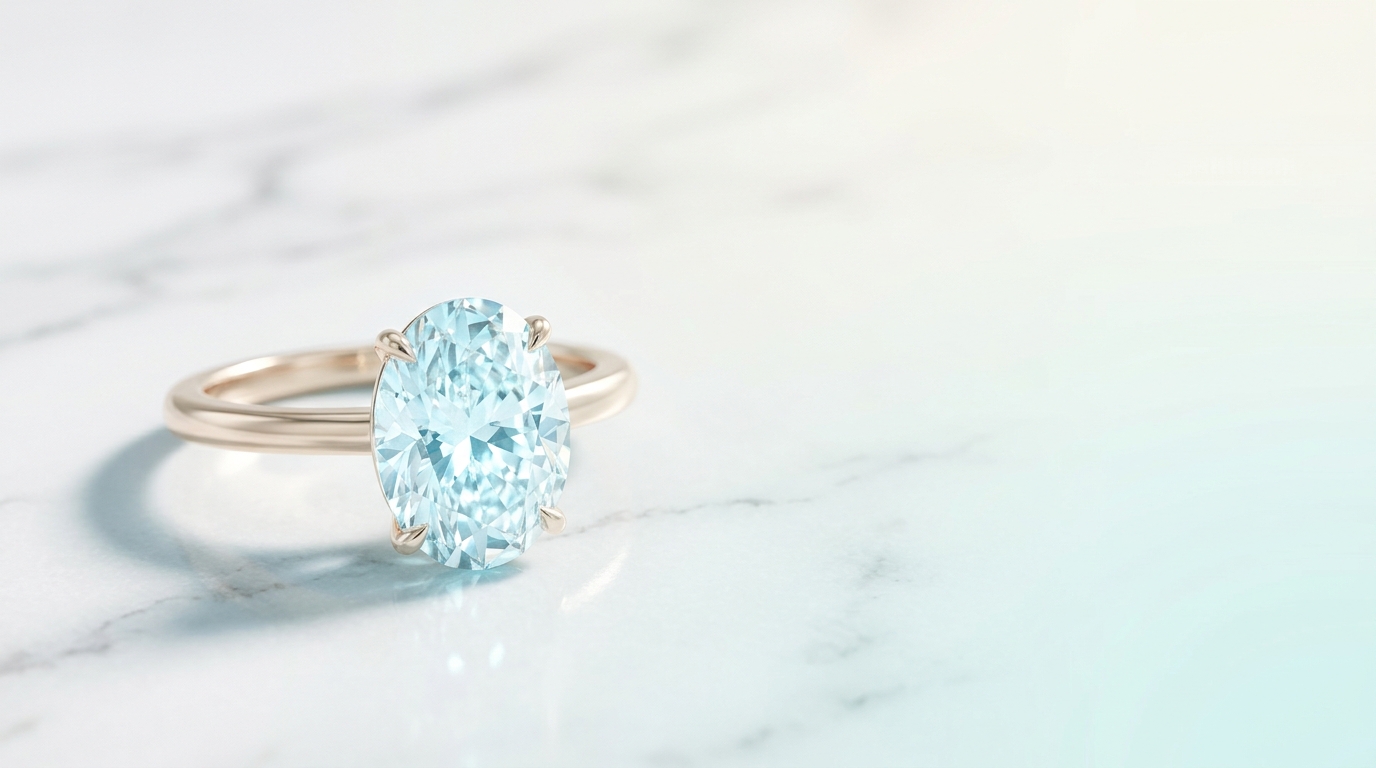
When you're generating designs, you don't need to change much about your prompts for lab-grown diamond pieces. The AI generates based on appearance and style, not stone origin. A round brilliant solitaire is a round brilliant solitaire whether the stone came from a mine or a reactor.
What does shift is your prompt strategy when you want to explore styles that tend to sell well in the LGD market. Oval cuts, emerald cuts, and elongated cushions are hugely popular with LGD buyers who can afford a bigger stone. If you're building a collection aimed at that segment, it's worth leaning into those shapes from the start.
In Studio, the Auto tool handles this well. Something like "oval cut center stone solitaire ring, 3 carat, thin band, yellow gold, minimal setting" will get you something usable immediately. For elongated cushions specifically, adding "stretched proportions, ratio approximately 1.5:1" helps the AI hit the shape correctly rather than defaulting to a rounder silhouette.
Once you have a direction you like, use the Multiple Angles tool to generate the same design from different viewpoints. LGD buyers shopping for larger stones care about how it looks from the side. The depth profile and table height matter to them in a way that smaller stone buyers often don't notice. A side view render alongside the standard top-down shot gives you more to work with in a client consultation.
Specifying Lab-Grown Diamonds in Your Pricing and BOM
This is where the studio workflow diverges from natural diamond work. When you move a design into pricing, Stone Type matters.
In the Pricing panel, when you add a stone specification, you'll see options for Natural Diamond and Lab Grown Diamond (LGD) as separate types, along with ruby, sapphire, and the rest. Selecting LGD tells Studio to use LGD-specific rate rules from your Price Book when calculating the per-carat cost. This is the critical step that most jewelers overlook when they first start pricing LGD pieces in Studio.
The practical effect: if your org has a Price Book configured with LGD rates, the Estimate Pricing AI tool will auto-populate costs using those rates when you confirm the stone type as lab-grown. If you're setting up pricing manually, you pick Lab Grown Diamond from the stone type selector and fill in shape, color, clarity, and carat weight.
One thing to know: the AI Pricing Estimation tool reads the design image and auto-populates a cost breakdown, but it won't distinguish LGD from natural diamond based on the visual alone. After running the estimate, you'll confirm or override the stone type manually. The estimate gets you close on stone count and approximate carat weight; the LGD call is yours to make.
Once you've confirmed the pricing manually in the Pricing Manager, Studio stores it as context for future AI generations in that project. Subsequent refinements stay consistent with the verified cost structure, which matters when you're iterating on a lab-grown diamond jewelry design that has to land within a specific client budget.
Setting Up Your Price Book for LGD
If you're an admin setting up Studio for a team that does meaningful LGD volume, getting the Price Book right for lab-grown diamonds is worth doing carefully.
You can define rules for any combination of stone type (select Lab Grown Diamond), shape, color grade, clarity grade, cut grade, and size range in millimeters. Rules with blank fields act as wildcards, so a single rule can cover all oval LGD stones in a given color and clarity tier.
The most specific rule always wins in matching. In practice, that means you can layer your rules:
A general LGD rule covering all shapes in common color and clarity tiers gives you a baseline. Shape-specific rules handle cases where your LGD pricing differs by cut (rounds and ovals typically don't price the same). Size-tier rules capture the real per-carat differences between, say, 0.5–1.0 ct and 2.5–4.0 ct stones. That per-carat gap is often bigger in LGD than in natural diamonds.
Bulk-import via CSV if you have existing rate tables. The downloadable template makes it straightforward to structure the file correctly. Preview the parsed data before saving; it's caught more than a few misformatted rows that would have silently skewed estimates.
Checking LGD Inventory Before You Quote
Once a design has a confirmed LGD specification in the Pricing panel, you can run it through the Diamond Inventory Matcher. This tool connects to your linked gem inventory and checks whether you have lab-grown stones that meet the design's specs: shape, approximate carat weight, color grade, and clarity grade.
The matcher returns available carats, piece count, and average price per carat for matching stones, with a green or red availability status for each requirement. That indicator is simple, but it's genuinely useful. When you're in a client consultation and someone asks about availability for a 2.5ct oval LGD in E/VS2, you can answer accurately in the same session where you're showing them the design.
One thing to keep in mind: the matcher searches within your org's connected inventory. Accuracy depends on how current your inventory feed is. It's a check against what you have, not a real-time market search.
Presenting LGD Designs to Clients
Once the design and pricing are sorted, the Catalog Deck is the cleanest way to share lab-grown diamond collections with clients who aren't in the room. You can configure each slide to display the stone specs, including stone type, alongside the design image and confirmed price.
Clients considering LGD tend to want to see the design from multiple angles before committing. Those Multiple Angles renders pay off here. Placing the design on a model image using Place on Model also helps, especially for rings. Seeing an oval lab-grown diamond solitaire on an actual hand, rather than floating on a white background, moves the conversation forward much faster.
For buyers who aren't local, share a named external catalog link. No Studio account required on their end, and you can revoke the link at any time. They can leave annotation comments on specific designs, which gives you clear written feedback without an email thread that becomes impossible to follow.
Keeping LGD Projects Consistent at Scale
If you're running bulk generation across a collection with consistent LGD specs, Project-Level Instructions are worth setting up. Include the stone type, typical carat range, and any aesthetic preferences (thin bands, modern settings, specific cuts) in your persistent instructions. Every generation in that project then starts from those baseline assumptions without you having to restate them in each prompt.
For larger teams generating LGD collections in parallel, the Snippet Library lets you save your best LGD-specific prompts once and share them organization-wide. Stone shape descriptions, setting styles that work well with larger stones, and any lighting or angle preferences you've found effective; save those as named snippets and they'll surface via autocomplete as any team member types in the prompt bar.
Lab-grown diamond jewelry design in Studio is mostly the same workflow as natural diamond work on the generation side. The meaningful differences show up in pricing specification, inventory checking, and Price Book setup. Getting those steps right is what lets you quote accurately, look professional in front of clients, and build out LGD-specific collections without having to rework your process from scratch.
If you haven't set up your LGD rates in the Price Book yet, that's the best place to start. Everything else flows from those rules: the estimates, the inventory checks, the confirmed pricing that feeds back into future generations.
Recent Posts
Jewelry Video Background Removal: How to Turn Any Product Clip Into a Scene-Ready Asset
Most jewelry product videos have their background baked in from the start — making them hard to reuse across different website themes, ad templates, and social formats. Studio's Matte Video tool strips any jewelry video background in one step, giving you clean isolated footage you can drop into any scene without a video editor.
Jewelry Product Videos With Audio: How to Go From Still Image to Social-Ready Clip in One Step
Most jewelers use multiple tools to get a scored, ready-to-post product video. Studio's Videography tool lets you pick duration and audio together in one submission — no separate music step, no timeline editing. Here's how to use it and where it fits into a practical jewelry marketing workflow.
Jewelry Product Descriptions With AI: Generate Copy That's Ready for Your Product Page
Studio's Generate Copy tool reads any jewelry design image and produces a product title, description, and selling points in seconds. Here's how to run it, what the output actually looks like, and how much editing you'll typically need before it goes live.